THE LIGHTING
(MP AND SP)
(MP AND SP)
Nice lighting can be a designers secret weapon, and if used correctly, can make an area look so incredible without doing very much work at all. In your planning, it would be good to include some ideas of how you want to light every area. Whatever you do, don’t assume that all lighting comes from above. Depending on your map, lighting can come from every angle in numerous styles. You will be amazed at how a blue light, in a spotlight or coned shape, coming up from the floor, will look. Or, the classic look is some fancy grating system on the ceiling that creates grid-like mosaics on the wall. The lighting you create can replace a ton work because it adds an unique touch to your areas that nothing physically built can mimic. Also, lighting is generally easier on the computer (depending on your engine) than a boatload of geometry. It’s best to get the strongest lights in place before adding what is called ambience. Ambient light is like a gentle flood light that ensures everything is getting some light, but you do not want to overdo these lights, it kills the mood...do them last. Also, i recommend getting nearly ALL the lighting the way you like it before moving onto the next area, it’s a time saver. This saves you from coming back and fighting conflicting lighting sorces later on.
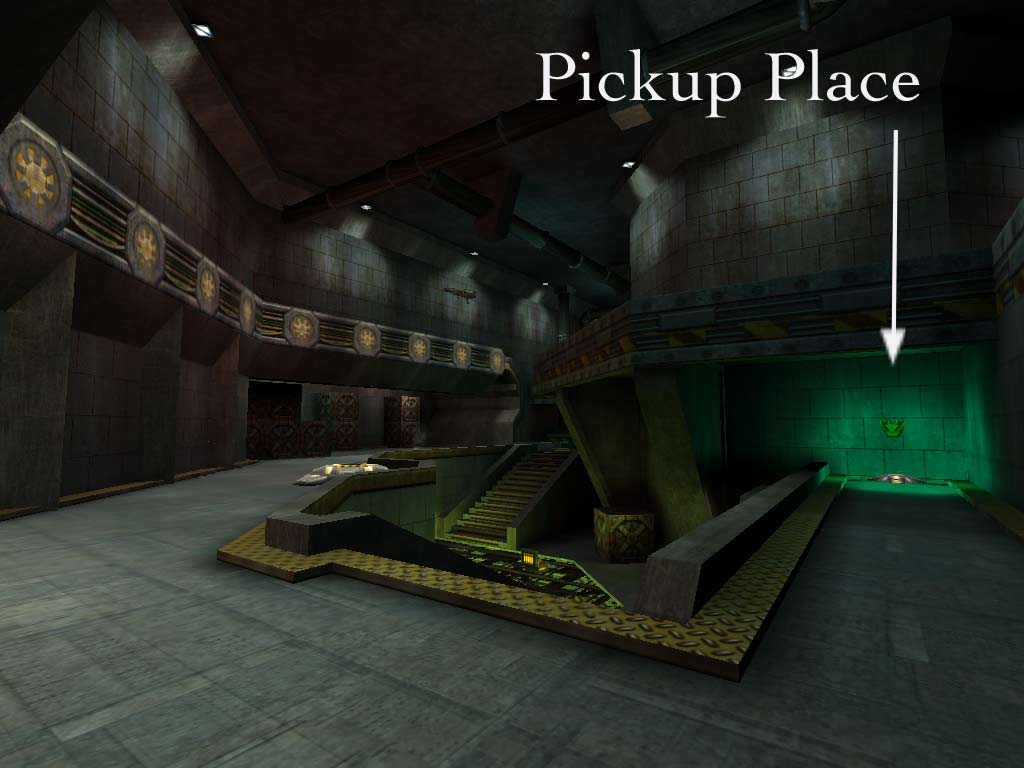
THE PICKUP PLACE
(PRIMARILY MP)
(PRIMARILY MP)
One thing that is often respected by game players all over, is signaling where the pick up items are. This is more up to your own personal design choice, but having something indicating where pickups are makes learning the map a little easier. An example of a pickup place is shown below, the item in the green light is body armor, floating above a pad. You can even go as far as to put armor in green lighting and weapons in red. Players who see this catch onto maps a lot faster, plus these little nuances can add a nice little touch to your area that may be lacking a little spice.
THE TOTAL PACKAGE
(MP AND SP)
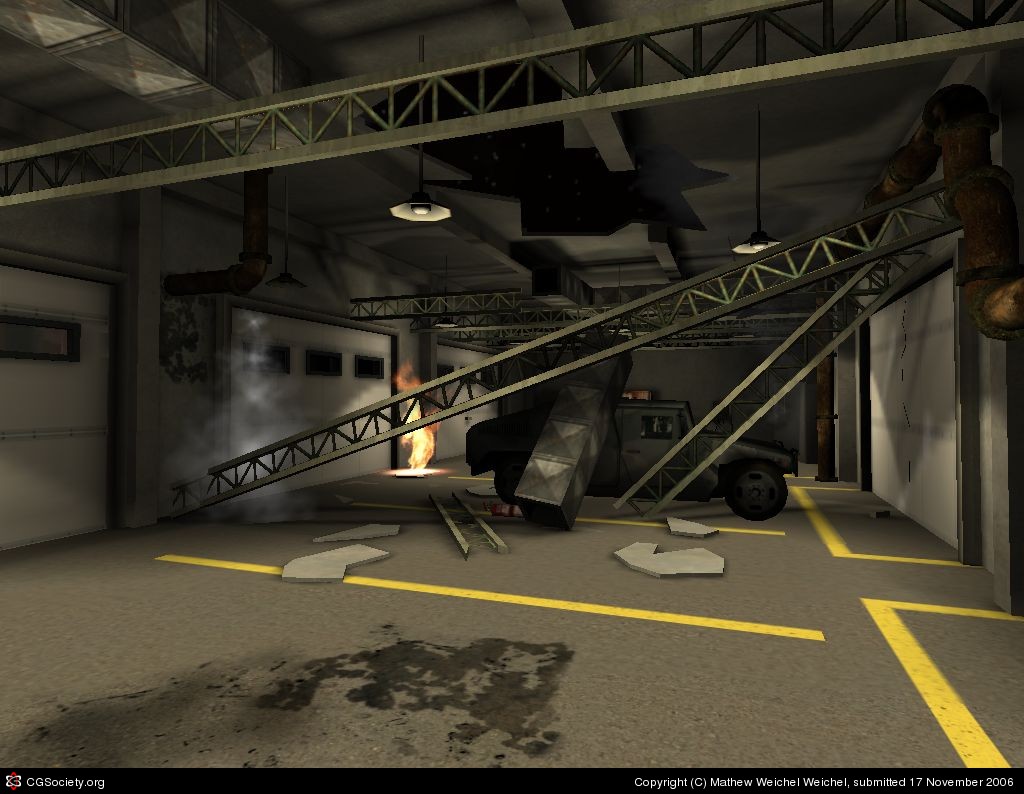
Now that you’ve got some idea on what adds flavor to an area, it’s important to bring the whole thing together. This means paying attention to everything in your map. If you have a wild ceiling, doors, walls, lighting, but don’t do any detail work to the ground, you are cutting youself and your players short of a perfectly rounded map. Sometimes designers (and i’ve been guilty) get too carried away with detailing out a section of a room, and then run out of (rendering) budget to finish a wall or floor. Know your limitations before going wild with the design. Every view of your map should be filled with a lot of things going on, like no matter what you are looking at, it’s worth taking a picture of. For example, in the picture below, I will show you how i detailed this room to capture this elaborate scene that took me only about a day to build:Floor:
2 Different dirt stains
Rubble
Painted sections dividing the floor
Fire
Hummer
Pipes
Walls:
Pipes
Stains
Garage doors
Tons of trim
Normal and broken rafters/beams
Some lighting effects
Steam
Ceiling:
Hole in roof/sky showing (great for lighting btw)
Ventilation shaft
Hanging lights
Pipes
Rafters/Beams
Trim


No comments:
Post a Comment